How to photograph small objects without harsh shadows
· Editorial team chicagonewsmark.com
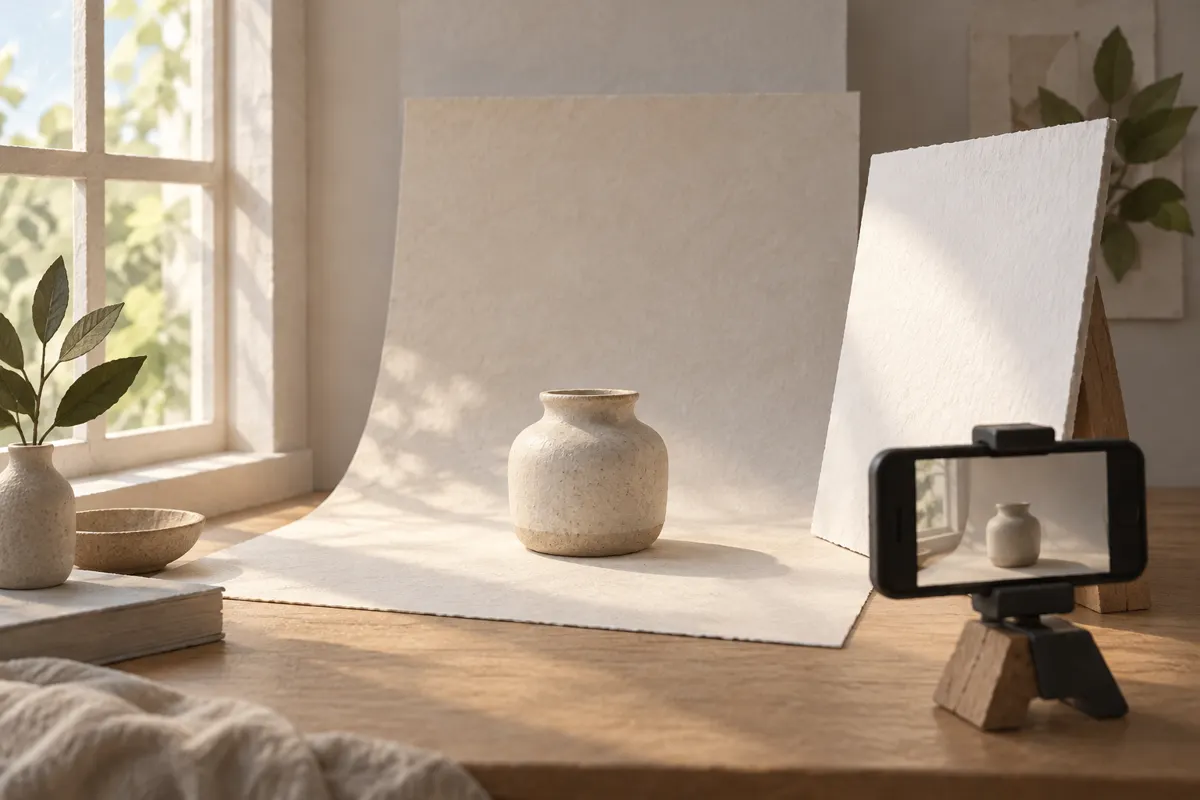
To photograph small objects without harsh shadows, place them beside a window with indirect daylight, use a plain background, and position a white card opposite the window to brighten the shaded side. Then steady your phone, tap the object to focus, and adjust exposure until its details remain visible. Aim for soft shadows that show the object’s shape rather than removing every shadow.
Build a simple setup beside a window
Our suggested home setup uses a table beside a window, a sheet of plain paper or matte card, and a separate white card as a reflector. It suits objects such as a small jar, a watch or a handmade ornament. Start with one object so you can see what each adjustment changes.
- Place the background on a stable surface and remove visible dust or crumbs.
- For an upright object, curve a large sheet of paper up behind it to avoid a distracting corner line.
- Choose a background that makes the object’s edges easy to distinguish.
- Wipe the phone’s camera lens gently with a clean microfiber cloth.
Leave enough room to move the phone and reflector. Check the whole camera preview for clutter, paper edges and reflections before concentrating on the object itself.
Soften the light before adjusting the camera
Look at the shadow beside your object. A dark shadow with a sharply defined edge signals that the light needs softening. If a beam of sunlight falls across the table, move the setup out of it or try another window. A sheer curtain can help diffuse direct sunlight.
- Position the window to one side of the object, then check how the light reveals its shape.
- Turn off nearby lamps and disable the phone’s flash so you can judge the window light on its own.
- Stand the white card opposite the window, facing the shaded side of the object.
- Move the card closer to brighten the shadow, or farther away if the object starts to look flat.
For glass or shiny metal, also watch for bright reflections. Rotate the object slightly or shift the phone until the reflection stops hiding important details. Change one thing at a time so you can tell which adjustment helped.
Set focus and protect bright details
Start in the phone’s regular photo mode. Tap the most important detail, such as the front lettering or a textured surface, to set focus. If that detail stays blurry, move the phone back a little and tap again. Getting closer than the camera can focus will not produce a sharper picture.
Adjust brightness using the exposure control your camera provides. On many phones, it appears after you tap the preview. Lower exposure slightly if pale surfaces lose their texture or a label becomes washed out. If the shaded side looks too dark, reposition the white card before brightening the entire image.
If your camera offers focus and exposure locking, use it once the view looks right. Controls vary by phone. After changing the distance between the camera and object, set focus again.
Choose an angle and steady the phone
Choose an angle that explains the object. An overhead view works well for flat items; a slightly elevated front view can show the top and sides of a small container. Leave some space around the edges so you have room to crop later. A camera grid can help keep the composition aligned.
- Hold the phone with both hands and rest your elbows on a stable surface when possible.
- Use a secure phone support and the self-timer if pressing the shutter causes movement.
- Check that your phone or body is not blocking the window light.
- Take a few frames, then enlarge one to inspect the important details.
Review the picture and make small edits
Before clearing the setup, check focus, shadow edges and bright areas. If lettering is blurry, refocus and steady the phone. If shadows remain harsh, adjust the light. If reflections conceal the surface, change the angle. These problems are easier to address while the object is still in place.
Finish with modest edits: crop distractions, straighten the frame, and adjust exposure or white balance if needed. Compare the image with the object beside you, especially when color matters. Avoid pushing contrast or sharpening so far that soft shadows become heavy or edges look artificial.